Unlock Wellness: The Power of Growing Wheatgrass at Home
Once considered a niche health trend, wheatgrass has firmly established itself as a potent superfood, beloved by health enthusiasts for its impressive nutrient profile. From its vibrant green hue to its concentrated benefits, a daily shot of wheatgrass can be a powerful addition to your wellness routine. However, the cost of consistently buying fresh wheatgrass shots from juice bars can quickly add up. The good news? Learning how to grow wheatgrass at home with or without soil is surprisingly simple, economical, and deeply rewarding. This comprehensive guide will walk you through everything you need to know, empowering you to cultivate your own endless supply of this verdant elixir right from your kitchen counter.
Why Grow Your Own Wheatgrass? Health Benefits & Cost Savings
The allure of wheatgrass extends far beyond its trendy status. This young grass of the common wheat plant (Triticum aestivum) is harvested at its peak nutritional value, typically 7-10 days after sprouting, before it develops into a grain. It's an excellent source of chlorophyll, often referred to as "the blood of plants" due to its similar molecular structure to human hemoglobin. But the benefits don't stop there.
- Nutrient Powerhouse: Wheatgrass is packed with an impressive array of vitamins, including A, B complex, C, E, and K. It also boasts essential minerals like iron, zinc, copper, and manganese, along with vital proteins.
- Natural Detoxifier: Known for its ability to cleanse the liver and blood, wheatgrass acts as a natural detoxifier, helping your body eliminate harmful toxins and heavy metals.
- Potent Antioxidant: Rich in antioxidants, wheatgrass helps combat free radicals in the body, reducing oxidative stress and fighting chronic inflammation, which is crucial for overall health and disease prevention.
- Digestive Aid: Its enzymes can aid in digestion and nutrient absorption, contributing to a healthier gut.
- Energy Booster: Many users report an increase in energy and vitality after incorporating wheatgrass into their diet, thanks to its dense nutritional content.
Beyond the undeniable health advantages, the financial savings of growing your own wheatgrass are substantial. A single shot of wheatgrass can cost upwards of $5 at a juice bar. Growing it yourself from organic seeds is a fraction of the cost, making it a sustainable and budget-friendly way to maintain your daily health regimen. Plus, you get the freshest possible product, harvested at its prime, without any concerns about processing or storage.
Getting Started: Essential Supplies for Home Cultivation
Whether you choose to grow your wheatgrass with soil or opt for a soilless method, the initial setup requires just a few basic items. The simplicity of the process is one of its most appealing aspects.
- Organic Wheatgrass Seeds: This is non-negotiable. Always opt for organic, hard red winter wheat berries or specifically labeled wheatgrass seeds. Non-organic seeds may be treated with fungicides or pesticides that you don't want in your juice.
- Water: Filtered water is ideal to avoid introducing chlorine or other contaminants to your sprouts.
- Sprouting Container/Glass Jar: For the initial soaking and sprouting phase, a clean glass jar with a mesh lid (or a piece of cheesecloth secured with a rubber band) works perfectly.
- Growing Trays: Shallow trays are essential. For the soil method, look for trays with drainage holes. For the soilless method, trays without holes or specialized hydroponic trays are suitable.
- Organic Potting Soil/Compost (for soil method): A good quality organic planting soil or compost will provide the necessary nutrients and structure for your grass.
- Spray Bottle: Handy for misting your growing grass to keep it adequately moist.
- Lid/Newspaper (for initial growth): To create a dark environment for early sprouting in the soil method.
Step-by-Step Guide: Sprouting Your Wheatgrass Seeds
The first few steps are universal, regardless of whether you plan to use soil or go soilless. Proper sprouting is key to successful wheatgrass growth.
- Rinse and Soak: Begin by thoroughly rinsing about 1/2 to 1 cup of organic wheatgrass seeds under cool water. Place them in your sprouting container or glass jar. Add about 3-4 cups of filtered water, ensuring the seeds are fully submerged, and let them soak for 8-12 hours (overnight is ideal).
- Drain and Rinse: After soaking, drain the water completely. Rinse the seeds well under cool running water.
- Aeration & Continued Rinsing: Invert the container, allowing any excess water to drain through the mesh lid. Leave it upside down, or at an angle, to ensure good air circulation. You'll need to rinse and drain the seeds 2-3 times a day for the next 2-3 days. This prevents mold and keeps the seeds hydrated.
- Observe Sprouts: Within 2-3 days, you'll notice tiny white rootlets emerging from the seeds. These are the sprouts, indicating they are ready for planting or further soilless cultivation.
Method 1: Growing Wheatgrass with Soil
The traditional method for cultivating wheatgrass involves soil, which many find intuitive and effective. This approach offers a rich, nutrient-dense growing medium for your grass.
- Prepare Your Tray: Take a shallow planting tray (with drainage holes) and add about 1 inch (2.5 cm) of organic compost or potting soil. Lightly water the soil until it's evenly moist but not waterlogged.
- Planting the Sprouts: Gently and evenly sprinkle your sprouted wheatgrass seeds across the surface of the moist soil. Try to cover the entire surface, but avoid piling them too thickly.
- Initial Dark Period: Lightly mist the seeds with water. Cover the tray with a lid, another tray, or a sheet of newspaper. Darkness encourages strong initial root development. Keep the tray in a warm spot, away from direct sunlight.
- Daily Care & Unveiling: Mist the seeds daily to keep them moist. After 3-4 days, when the grass blades reach about 1-2 inches (2.5-5 cm) tall, remove the lid or newspaper. At this point, the grass will need light to turn green.
- Continued Growth: Place the tray in a bright spot, but avoid harsh, direct sunlight, which can scorch the delicate blades. Continue to water the soil daily, ensuring it remains moist.
- Harvest Time: Your wheatgrass will be ready for harvest when it reaches about 5-7 inches (12-18 cm) in height and begins to "joint" (a second blade starts to emerge). This typically takes 7-10 days after planting. To harvest, simply cut the grass close to the soil line using sharp scissors.
- Second Harvest & Replanting: You can often get a second harvest from the same tray. After the first cut, continue to water daily, and new blades will grow. However, the second growth is often less potent than the first. After the second harvest, it's best to discard the old soil and seeds and start a fresh batch to ensure maximum nutritional value.
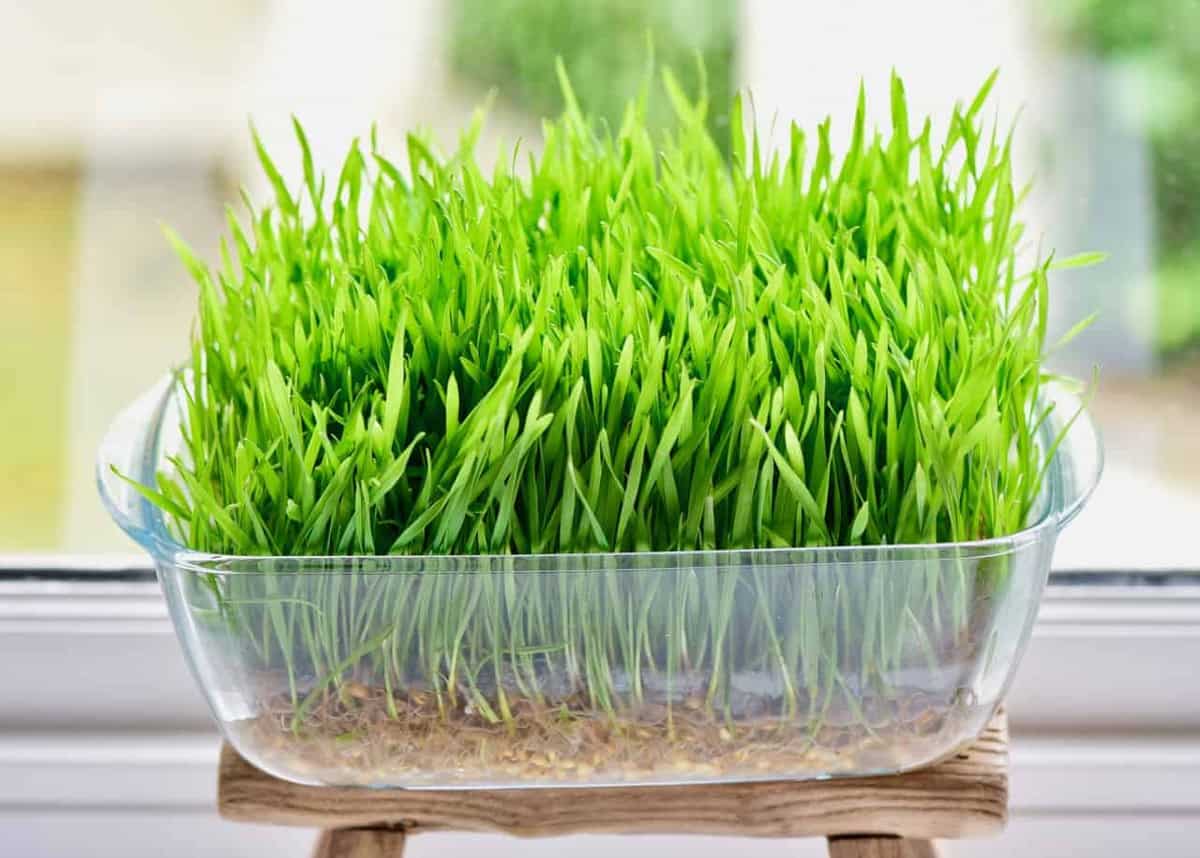
Method 2: Growing Wheatgrass Without Soil
For those seeking a cleaner, potentially less messy, and space-efficient way to grow wheatgrass, the soilless method is an excellent choice. This technique leverages hydroponic principles, relying solely on water and the seeds' internal nutrients for growth. It's an ideal approach for growing fresh wheatgrass at home without soil, especially in urban environments.
- Prepare Your Tray: For soilless growth, you can use specialized hydroponic trays with a mesh insert or simply a shallow tray without drainage holes. If using a basic tray, some people place a layer of damp paper towels or a thin mesh screen at the bottom. The key is to provide a surface for the seeds to sit on while allowing roots access to water.
- Planting the Sprouts: Evenly spread your pre-sprouted wheatgrass seeds onto the mesh screen or damp paper towel within your tray. Again, avoid overcrowding.
- Water Level: If using a mesh screen, add about 1/4 to 1/2 inch of filtered water to the bottom of the tray, ensuring the water level is just below the mesh, allowing the roots to reach it without submerging the seeds entirely. If using damp paper towels, ensure they remain consistently moist.
- Initial Growth & Misting: As with the soil method, place a lid or cover over the tray for the first 3-4 days to encourage root growth in darkness. Mist the seeds with water 2-3 times a day to keep them hydrated. This is critical for soilless methods, as there's no soil to retain moisture.
- Light & Ongoing Care: Once the grass reaches 1-2 inches, remove the cover and move the tray to a bright location, away from direct, harsh sunlight. Continue to mist the grass daily, ensuring the root mat (if applicable) is moist and the water level in the tray (if using a hydroponic setup) is maintained. You may need to change the water in the tray every other day to prevent stagnation and mold.
- Harvest Time: Just like the soil method, your soilless wheatgrass will be ready for harvest in 7-10 days, when it's 5-7 inches tall. Cut the grass close to the root mat with sharp scissors.
- Replanting: While a second harvest is possible, its nutritional value will be significantly diminished. For optimal health benefits, it's generally recommended to discard the spent root mat and start a fresh batch of seeds after the first or second cut. Both methods offer simple steps for growing wheatgrass with or without soil, making it accessible to all.
Harvesting and Using Your Homegrown Wheatgrass
Once your wheatgrass is ready, the next step is to transform it into its most potent form: juice. While you can technically chew the grass, juicing extracts the concentrated nutrients without the fibrous pulp.
- Juicing: A masticating juicer is highly recommended for wheatgrass, as it efficiently extracts juice from the fibrous blades without damaging the delicate enzymes and nutrients that a centrifugal juicer might. If you don't have one, you can blend the cut wheatgrass with a small amount of water and then strain it through a fine-mesh sieve or nut milk bag.
- Storage: Freshly squeezed wheatgrass juice is best consumed immediately. Its potency and enzyme activity begin to degrade quickly. If you must store it, place it in an airtight container in the refrigerator and consume within 24 hours.
- Culinary Uses:
- Shots: The most common way to consume wheatgrass. Start with a small amount (e.g., 1/2 shot or 30ml) if you're new to its strong, grassy flavor, and gradually increase as your palate adjusts.
- Smoothies & Juices: Supercharge your favorite fruit and vegetable smoothies or juices by adding a shot of wheatgrass. The other flavors can help mellow its intensity.
- Dressings & Sauces: Incorporate a small amount into salad dressings, pestos, or even some savory sauces for a nutrient boost.
- Non-Culinary Uses: Wheatgrass isn't just for drinking! Its beneficial properties can also be applied externally:
- Bath Soak: Add wheatgrass juice to your bathwater for a detoxifying and skin-soothing experience.
- Scalp Treatment: Massage a small amount into your scalp before rinsing to promote hair health.
- Topical Application: Apply it topically to soothe minor skin irritations, insect bites, or scratches.
Tips for Success and Troubleshooting
While growing wheatgrass is straightforward, a few tips can help ensure a consistently healthy crop:
- Preventing Mold: Mold is the most common issue. To prevent it, ensure proper air circulation, avoid overwatering (especially in the early stages), and make sure your seeds are well-drained after rinsing. If you see fuzzy white mold, it’s best to discard the batch and start over.
- Choose Organic: Always use organic seeds to avoid chemicals and ensure the purest product.
- Light Requirements: Wheatgrass needs light to turn green and produce chlorophyll, but direct, intense sunlight can dry it out or scorch it. A bright spot with indirect light is ideal.
- Harvesting for Potency: Harvest when the grass is 5-7 inches tall. Harvesting too early or too late can impact its nutritional profile.
- Cleanliness: Keep all your equipment clean to prevent bacterial growth or contamination.
Conclusion
Cultivating your own wheatgrass at home is an empowering step towards greater health and self-sufficiency. By understanding how to grow wheatgrass at home with or without soil, you gain access to a powerful superfood that can support detoxification, boost energy, and provide a wealth of essential nutrients, all while saving you money. With just a few simple steps and a commitment to daily care, you can enjoy fresh, vibrant wheatgrass shots whenever you desire, making a tangible investment in your well-being. So, grab some seeds, choose your preferred method, and embark on your journey to homegrown health!
